If you’re a fan of whipping up low-code apps using PowerApps, you may have also had to figure out how to provide authentication for your end users. A strong choice here is to use Azure AD B2C. While PowerApps Portal provides a built-in B2C integration, things get trickier if you need to do more complex user authentication journeys or need to add other cloud services in front of B2C using XML-based custom policies.
In this post, we’ll get into how you can bring custom domains (e.g., login.mycompany.com), B2C, custom policies and Power Apps Portal together to build a fully white-labelled experience that will enhance your business image, promote consumer trust all while enhancing security.
Prerequisites:
- A B2C instance configured for custom policies
- Azure Front Door, configured to point to your B2C instance
- A PowerApps Portal instance
Get Started
All set? Let’s get started with why you can’t use the default provider!
Using the default B2C provider with a custom domain gives the error below.
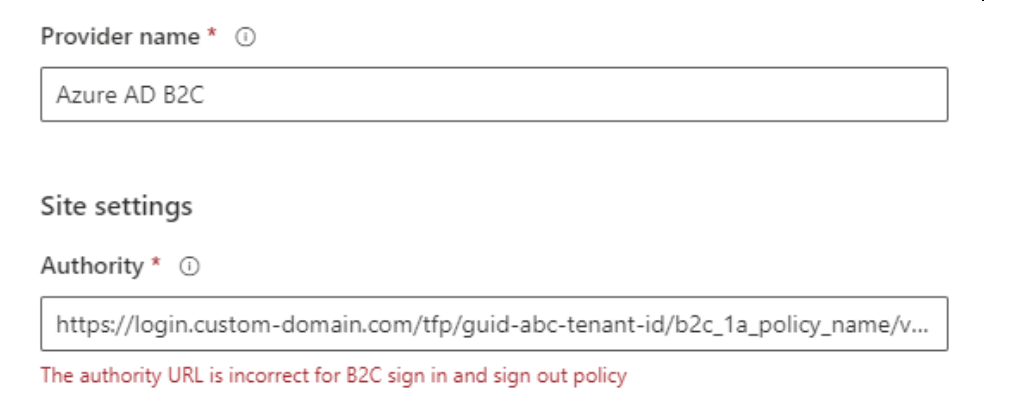
However, using a regular B2C configuration that ends with a “.b2clogin” domain works. Thankfully, B2C implements the OpenID Connect (OIDC) protocol, so we can use that provider to manually configure our custom domain-enabled policy.
Configuration Steps
PowerApps Initial Setup
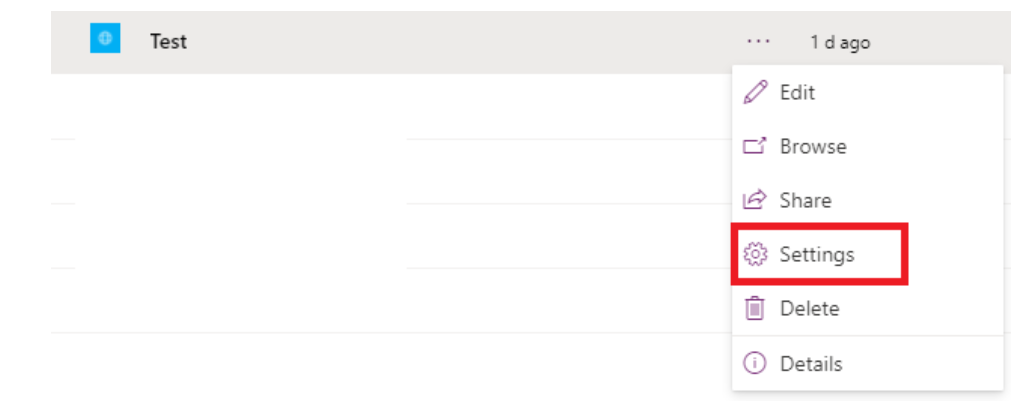
- Navigate to your app, then click on the three dots (…) to bring up the menu.
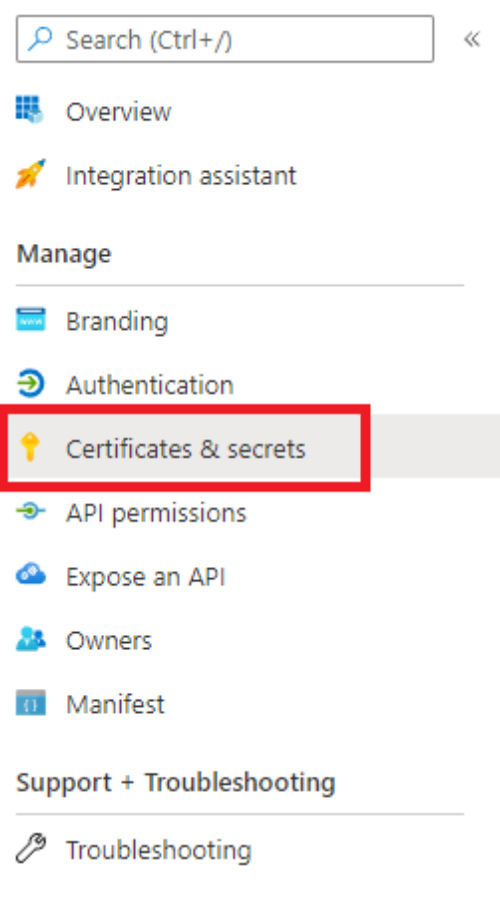
- Select “Settings
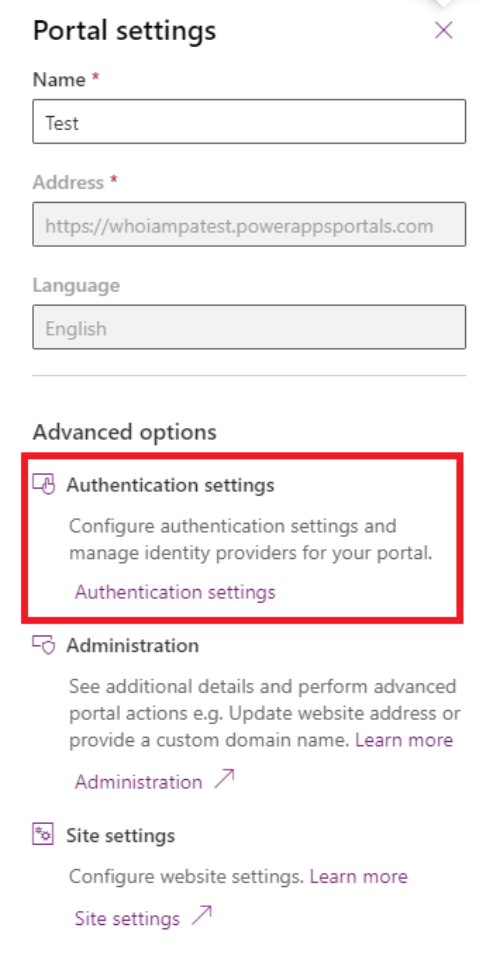
Then, select the “authentication settings” link
4. Follow the instructions on the Microsoft documentation page from steps 1 through 7: (portal configuration). This will take you through the initial setup of the OpenID Connect provider
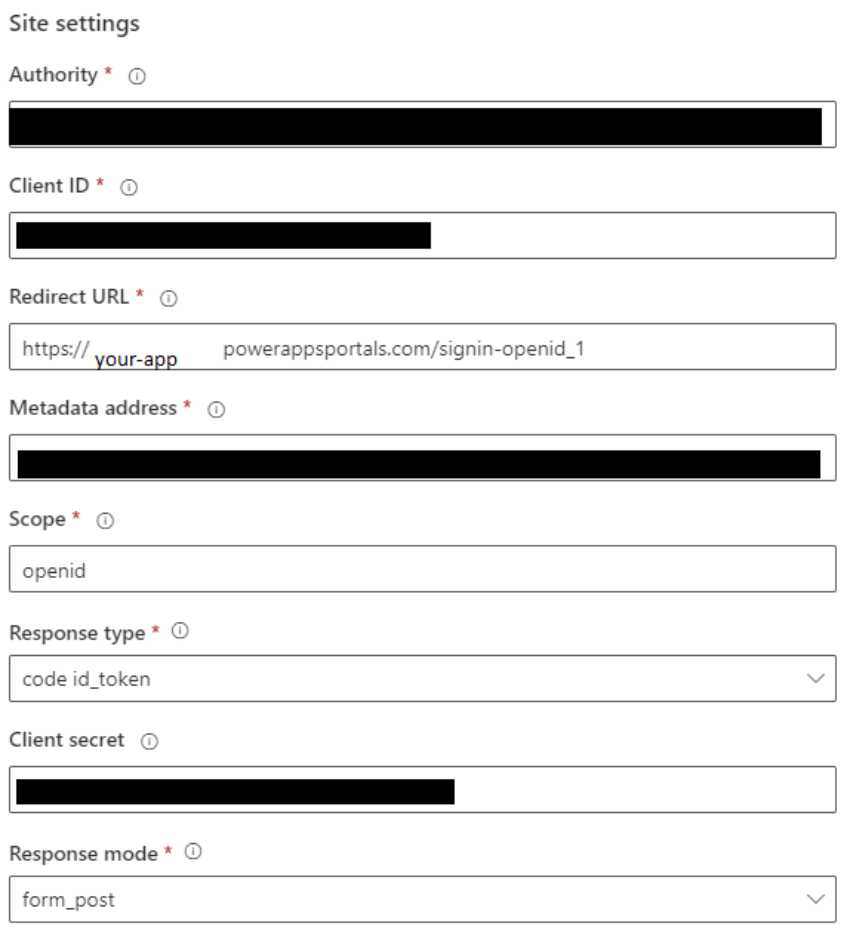
5. You should now be on a form that looks like the screenshot below.
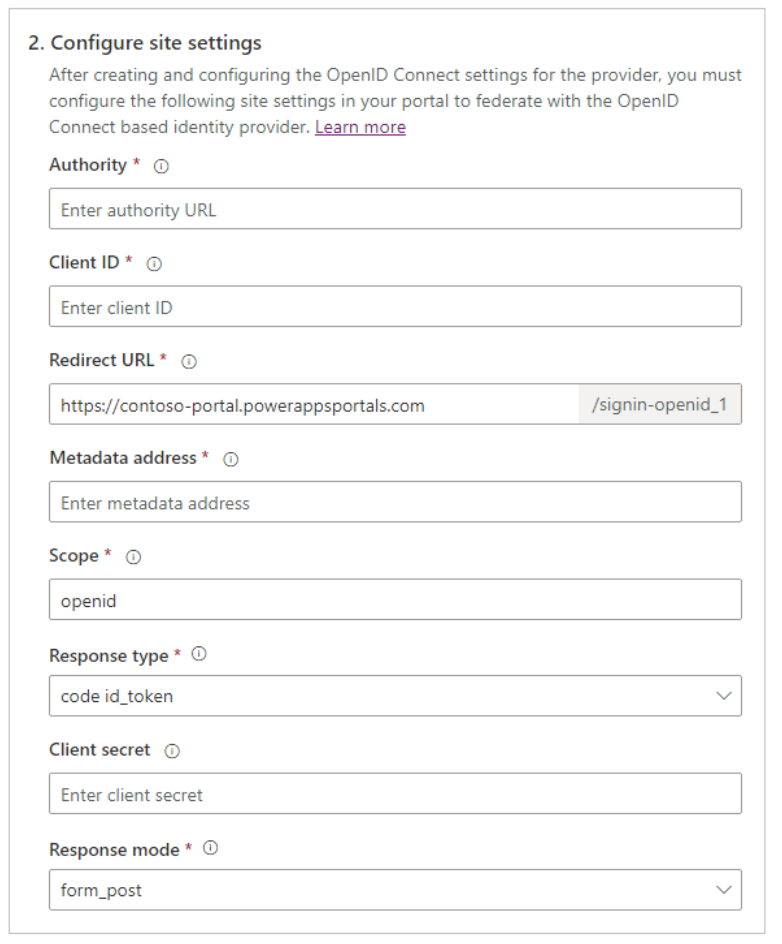
6. Copy the value for “Redirect URL” into your clipboard or a text editor.
B2C App Registration
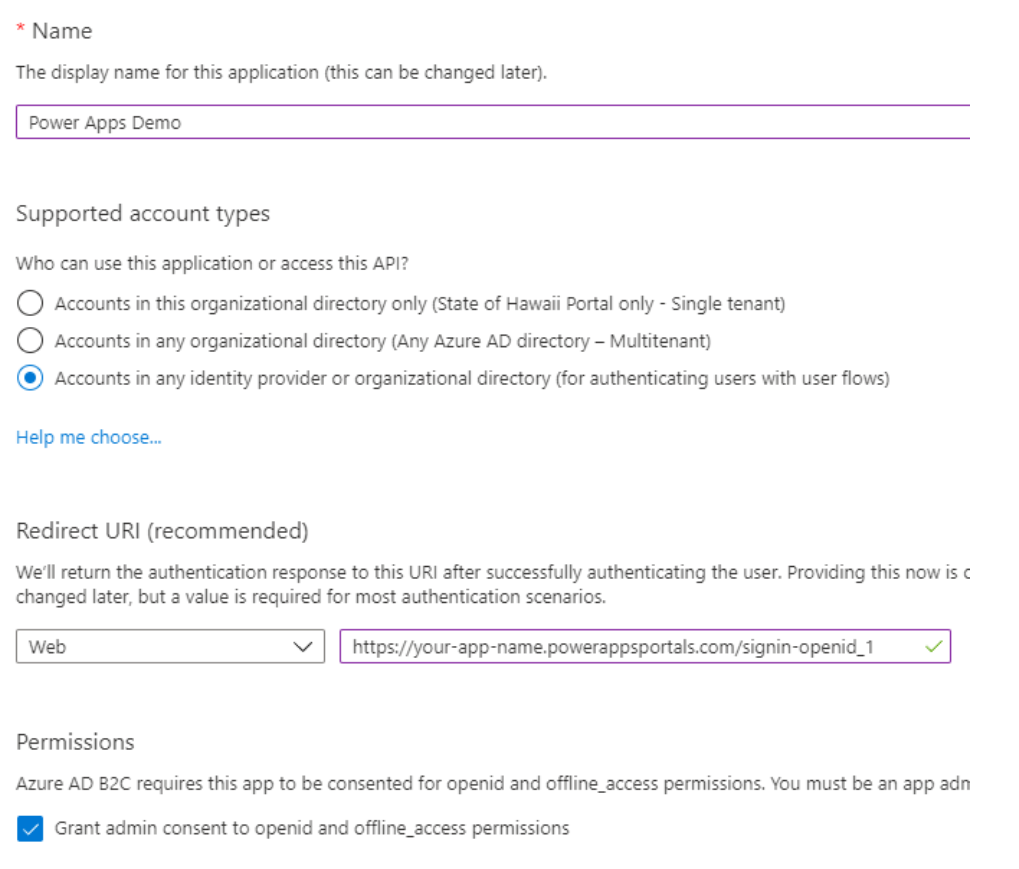
- Next, you’ll need to configure the application on the B2C side. If you have an existing application, skip to step 3.
- Create a new application in the B2C portal with this configuration. For the “Redirect URI” field, leave the dropdown as “Web” and paste the URL from the previous section.
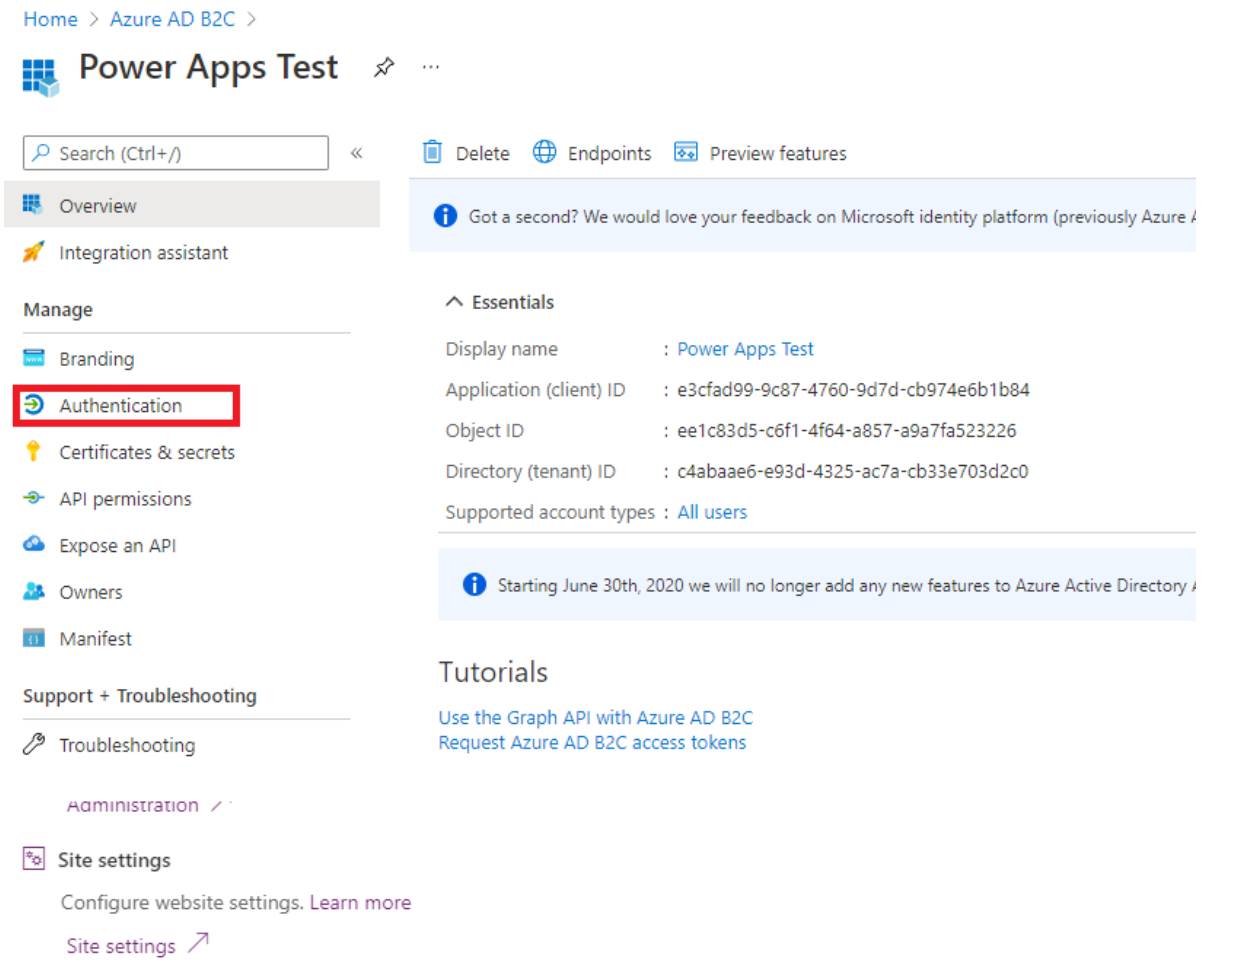
3. If you have an existing app, go to “Authentication” on the left hand nav menu
4. Add the redirect URI to the list using the “Add URI” button. If you’re migrating from a managed B2C implementation, removing the entry that ends with “signin-aad-b2c_1” entry will break it, so don’t delete it until you’re completed the switch.
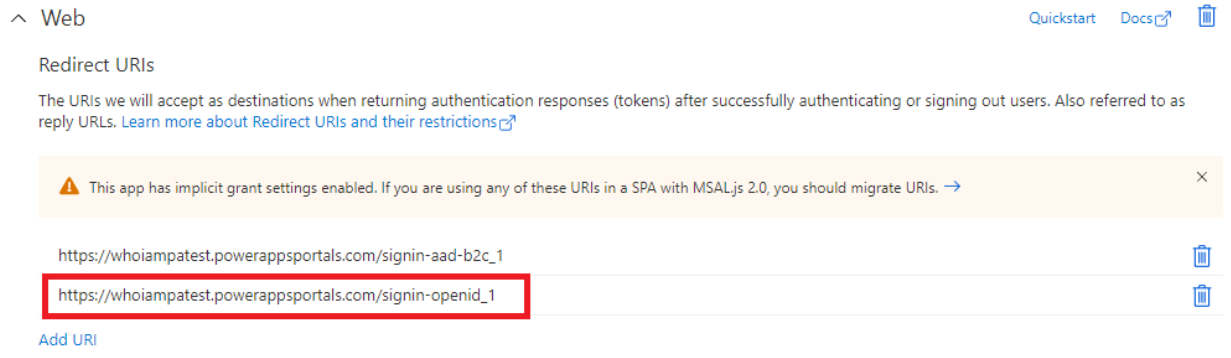
Add the redirect URI to the list using the “Add URI” button. If you’re migrating from a managed B2C implementation, removing the entry that ends with “signin-aad-b2c_1” entry will break it, so don’t delete it until you’re completed the switch.
7. Navigate back to the overview page and record the client ID.
Site Settings
- For “Authority” use Error! Hyperlink reference not valid.
- For “Client ID”, use the value from the previous section
- The value for Redirect URL should already be filled in
- For “Metadata”, use Error! Hyperlink reference not valid.well-known/openid-configuration
- Navigate back to the Power Apps configuration page.
- Leave “Scope” as “openid”
- For “Response type”, select “code id_token”
- Paste the client secret from the previous section into the “Client secret” field
- Leave “Response mode” as “form post”
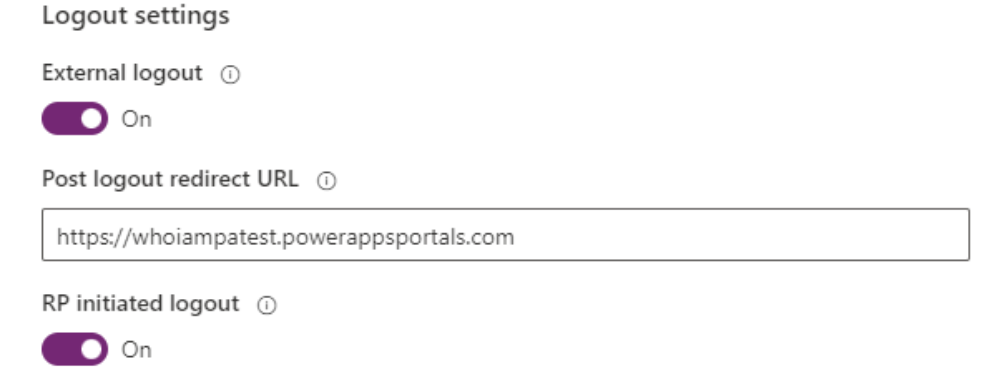
- External logout: on
- For “Post logout redirect URL”, use the home page of your Power Apps page.
- RP initiated logout: on
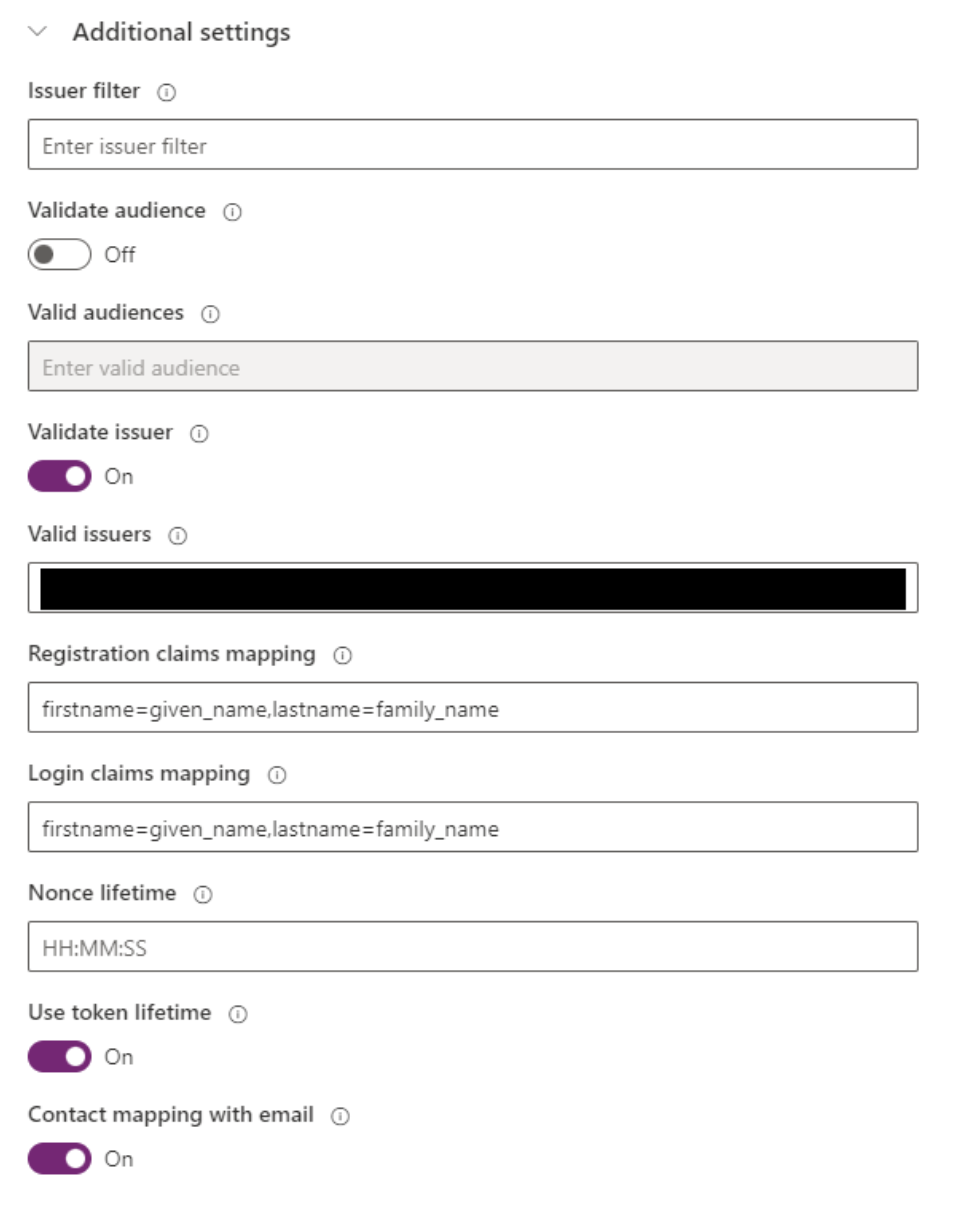
- Expand the “additional settings” dropdown
Additional Settings
- Validate audience: on
- For the “valid audiences” field, use the clientId of the b2c app registration without dashes.
- e.g. “guid-abc-123–456” becomes “guidabc123456”
- Validate issuer: on
- Valid issuers: Error! Hyperlink reference not valid.
- Registration claims mapping: firstname=given_name, lastname=family_name
- Login claims mapping: firstname=given_name,lastname=family_name
- Nonce lifetime: default
- Use token lifetime: on
- Contact mapping with email: on
Finishing Up
- Save the configuration
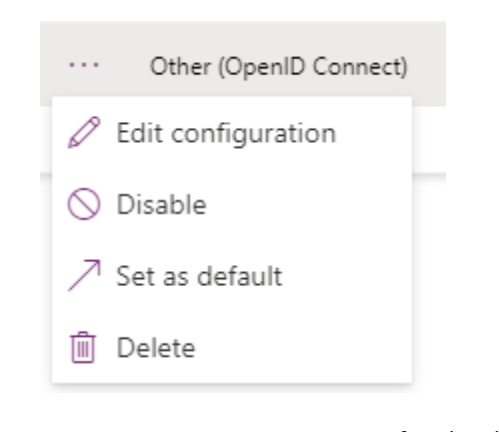
- Select ‘Set as default” on the provider menu of the OpenID Connect provider
- Wait a minute or two for the default setting to apply. Then, navigate to your portal page, clear your cache and try the sign-in button
Troubleshooting
The following configuration settings will cause errors:
- Not having “tfp” in the policy issuer/authority claim
- Not having “tfp” in the claims
- External logout + RP initiated logout both need to be checked for logout to work. Otherwise, you’ll get an error on re-login because the session wasn’t invalidated on the B2C side
Reference MSDN Docs:
B2C configuration for non-custom domains (works for custom policies)
OIDC provider configuration
https://docs.microsoft.com/en-us/powerapps/maker/portals/configure/configure-openid-provider
We’d love to hear more about your own experiences with integrating PowerApps Portal with Azure AD B2C or other authentication providers. Drop us a comment below, or you can also follow us on Medium at https://medium.com/@TeamWhoIAM
-Matt Takemoto